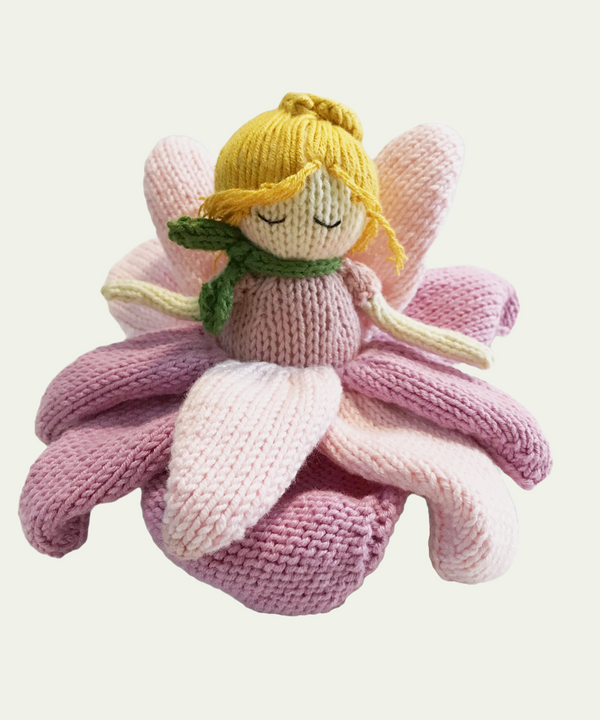
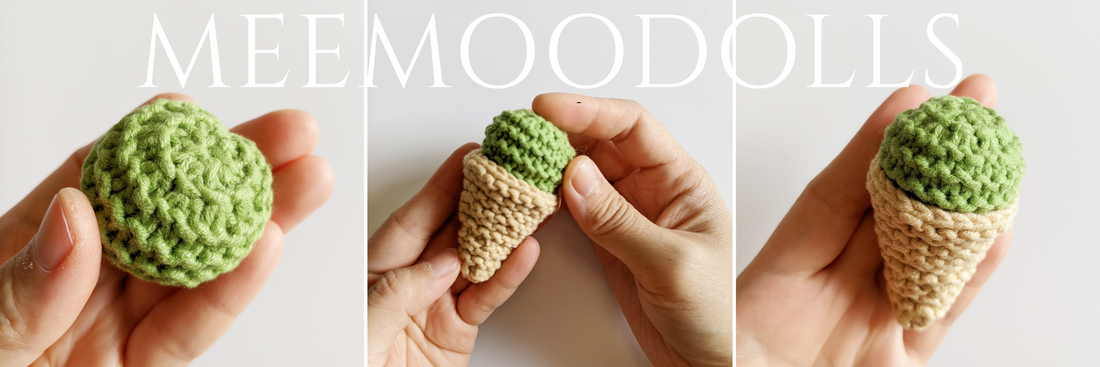
Introducing our delightful Ice Cream Cone knitting pattern — the perfect treat for crafters looking for a quick, easy, and satisfying project! This pattern is an excellent primer for beginners eager to explore the world of amigurumi knitting. You'll learn essential techniques like seamless closing and the mattress stitch, making it a sweet starting point for those new to the craft. Get ready to churn out your very own adorable knitted ice cream cone in no time!

ABBREVIATIONS
- K: Knit
- K2tog: Knit 2 stitches together to decrease by one
- KFB: knit through the front and back loop of the next stitch to increase by one
MATERIALS AND TOOLS
- Method: Work flat then close seams using a tapestry
- Knitting Needles: 00 mm
- Yarn: The product in the picture was made with Yarnart Jeans Plus.
WRITTEN PATTERN
For all pieces, please use the long-tail cast-on method, unless specified differently. When casting on for the cone, utilize beige yarn to initiate with 7 stitches, ensuring you leave approximately 20 cm/ 8 inches of yarn at the end.
Row 1 (Wrong side): Knit (7 sts)
Row 2: K1, KFB*5 times, K1 (12 sts)
Row 3 - 7: Knit (12 sts)
Row 8: K1, (KFB, K1)*5 times, K1 (17 sts)
Row 9 - 13: Knit (17 sts)
Row 14: K1, (KFB, K2)*5 times, K1 (22 sts)
Row 15 - 19: Knit (22 sts)
Row 20: K1, (KFB, K3)*5 times, K1 (27 sts)
Row 21: Knit (27 sts)
Bind off and then cut the yarn, ensuring to leave a tail about 40 cm (or approximately 16 inches) long.
CLOSE THE CONE ON THE CAST-ON ROW
Start by finding the long tail of yarn you reserved at the beginning of your project. Thread this tail through the eye of a tapestry needle. Carefully weave the needle and the yarn through all 7 of the cast-on stitches. Ensure that the tapestry needle passes through each stitch to gather them together effectively. With the yarn threaded through the stitches, gently but firmly pull on the tail. This action will tighten the cast-on row, causing the edges of the cone to draw together and begin to close. Continue pulling the tail until the opening at the tip of the cone is completely closed and the shape is nicely secured.

FORMING ICE CREAM CONE
With the cast-on row pulled tight and the cone's tip closed, we're ready to join the edges to form the cone's body. Here’s how to finish your knitted ice cream cone with the mattress stitch, which will create an almost invisible seam:
Insert the needle from the bottom up through the first stitch on the right edge of the cone. Now, cross over to the left edge, identifying the two horizontal bars of the first stitch. Insert the needle from the bottom up under these bars. Move back to the right side, and mirror this action by inserting the needle under the two horizontal bars of the next stitch up. Alternate sides, always weaving the needle under the two bars of the corresponding stitches, as if lacing up shoes. Every few stitches, gently tug on the yarn to bring the edges together but keep the tension loose enough for adjustment.
After seaming halfway, firmly but gently pull the yarn to cinch the seam, fine-tuning the tension for an invisible look. Continue with the mattress stitch all the way to the top of the cone. Once you reach the end, tighten the yarn to close up the seam entirely, and secure the yarn with a discreet knot on the inside.
Finally, weave in the loose ends to maintain a tidy finish. Your ice cream cone should now have a beautifully closed seam that's barely noticeable, giving your project a professional, polished look.

ICE CREAM SCOOP
Use green yarn for the scoop. Cast on 12 stitches, allowing for roughly 20 cm or 8 inches of yarn tail.
Row 1 (Wrong side): Knit (12 sts)
Row 2: K1, KFB*10 times, K1 (22 sts)
Row 3 - 15: Knit (22 sts)
Row 16: K1, K2tog*10 times, K1 (12 sts)
Row 17: Knit (12 sts)
Row 18: K1, K2tog*5 times, K1 (7 sts)
Trim the yarn, ensuring you leave a tail about 20 cm or 8 inches long. Thread this end through a tapestry needle, then run it through the last 7 stitches on your needle. Draw the yarn snugly to gather these stitches and close the scoop. Then, continue to seam the scoop using the mattress stitch. Begin at the gathered top, methodically matching the loops on either side to create a seamless and invisible join as you work your way down. Be sure to maintain an even tension and periodically pull the yarn through. When you're close to finishing, leave a small gap before completely sealing the seam. This will be the opening for stuffing the scoop. Fill it to your preferred plumpness, then neatly stitch up the opening, and secure the yarn with a final weave-in to conceal the end.

STUFFING
Gently stuffing the scoop to the desired fullness, ensuring that it maintains its shape without overfilling. With the stuffing in place, take the tapestry needle already threaded with the yarn tail and weave it through the remaining open stitches at the top of the scoop. Draw the needle all the way around the circle, then pull the yarn tail tight to cinch the opening closed. Adjust as necessary to ensure an even closure, and once satisfied with the appearance, secure the end with a knot and weave any remaining yarn tail into the body of the scoop to hide it.

COMPLETE ICE CREAM CONE
Now that your knitted scoop is filled and closed, it’s time to assemble your delightful ice cream creation. Place the stuffed scoop on top of the cone, adjusting it so that it sits perfectly. The result is a charming knitted ice cream, full of texture and crafted with care. Enjoy your sweet-looking project, and I hope you find joy in this quick and easy pattern that’s as much a treat to make as it is to behold!

THE END
I'm eagerly anticipating the reveal of your beautiful creations! To share your finished dolls with me, please post a picture on www.meemoodolls.com or directly on my Etsy shop at https://www.etsy.com/shop/meemoodolls. I look forward to celebrating your handiwork!